Configuring the PAL Network Settings |
Topic: PAL023
|
|
In order to configure the PAL Network Settings, the software utility EIPConfiguration Tool is required. The download for the EIPConfiguration Tool can be found here: https://support.automationdirect.com/products/nitra.html
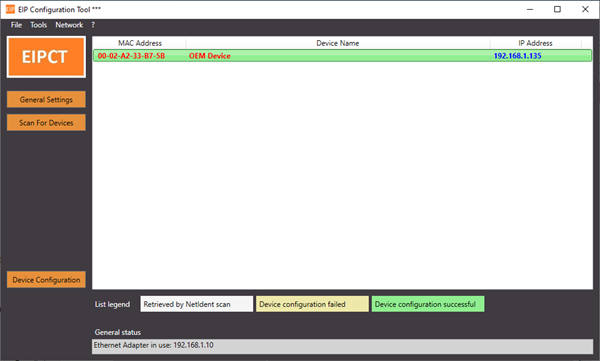
The EIPConfiguration Tool is a software utility that will scan and discover any NITRA PAL Controllers connected to the network (as well as any EtherNet/IP-capable NITRA CMV modular plates). With the EIPConfiguration Tool, the user can configure the network settings (IP address, subnet mask, default gateway) of their device.
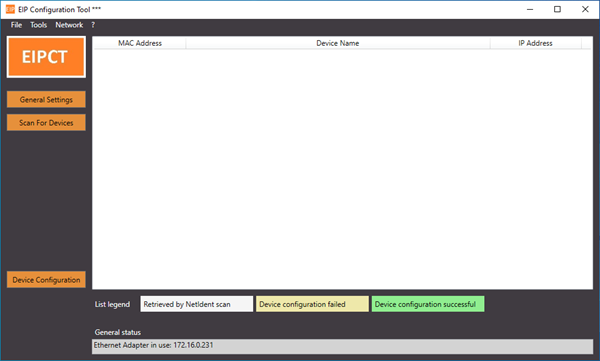
Upon opening the EIPConfiguration Tool, the PC’s default network adapter will be displayed in the General Status field. If the PC being used has multiple network adapters and an adapter other than the default is needed, follow the steps listed below.
- From the menu bar, click the Network menu and select Adapter.
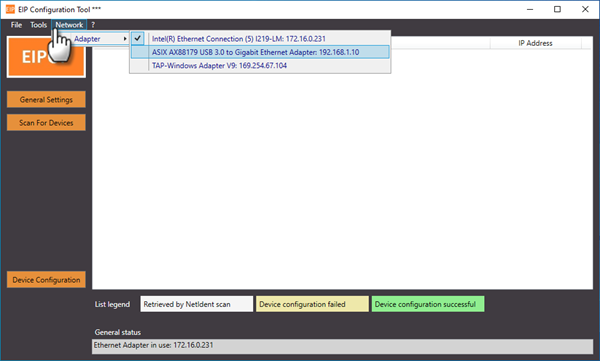
- Select the PC’s network adapter that is connected to the same network as the NITRA PAL Controller.
The EIPConfiguration Tool will automatically scan the network. When no change of network adapter selection is required, the user can click the Scan for Devices button to also scan the network.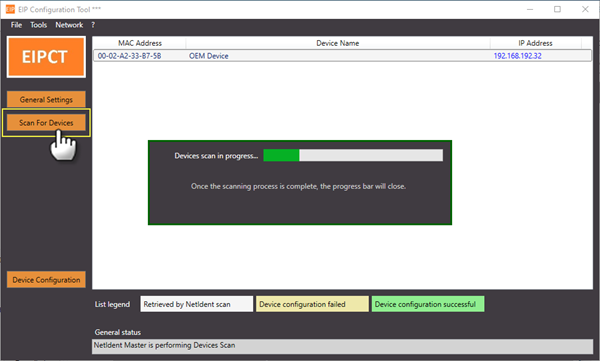
Any discovered NITRA PAL Controller will be listed in the utility window.
Entering the Static IP Address, Subnet Mask and Default Gateway
With the discovered device selected, click the Device Configuration button or double-click the selected device to open the network settings window. Here the user can enter the static IP address, subnet mask, and default gateway needed for the device.
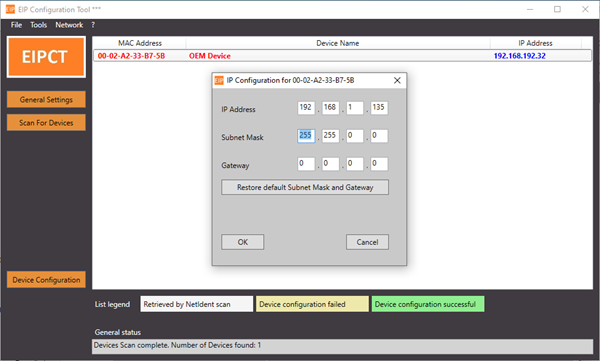
Once the parameters are set, click OK. The new network parameters are written to the device and the network is rescanned. The device should once again be discovered, only now showing the new IP address.